Three years ago I couldn’t make toast, much less sprout grains and grind my own bread flour. I couldn’t tell you a thing about making soups, water kefir, keeping a sourdough starter, substituting healthy sugars and oils in recipes, or any of those things that I do without a second thought these days. That was before I was introduced to Sally Fallon. Her book, that is. Nourishing Traditions is the bomb dot com, and I encourage anyone interested in learning about real food to purchase it.
I started this blog because I know there are others out there like me who think they can’t cook. You can. Not only that, but you can make healthy, nutritious foods that taste amazing and that will spoil you so you can’t go out to just any restaurant and be impressed. It all starts with the ingredients. The farmer. The soil. Real food doesn’t take much to be delicious. It isn’t complicated. Real, organic, especially local foods just taste better. It’s true, and if Doritos taste better to you than an arugula salad with local chevre and beets, or green beans fresh from the garden, then it’s safe to say you have been colonized by the enemy, and all efforts should be concentrated on getting them out so you have some hope of a real life ahead.
This post is about how to sprout grain. Why soak? Because by soaking and then sprouting your grains you release their enzyme inhibitors. I am not a doctor or a nutritionist, but apparently enzyme inhibitors block the absorption of important nutrients. Here is an excerpt from the Weston A. Price website:
“Grains require careful preparation because they contain a number of antinutrients that can cause serious health problems. Phytic acid, for example, is an organic acid in which phosphorus is bound. It is mostly found in the bran or outer hull of seeds. Untreated phytic acid can combine with calcium, magnesium, copper, iron and especially zinc in the intestinal tract and block their absorption. This is why a diet high in improperly prepared whole grains may lead to serious mineral deficiencies and bone loss. The modern misguided practice of consuming large amounts of unprocessed bran often improves colon transit time at first but may lead to irritable bowel syndrome and, in the long-term, many other adverse effects.”
I encourage you to visit that link and read more. It’s fascinating to discover how right primitive cultures were, and how unbelievably wrong we are. Let’s get down to business.
What you will need:
(Note: You can accomplish this recipe with 1/2 lb of wheat berries, or 5 lbs. The amount is entirely up to you, so take from this recipe, simply the method.)
-Wheat berries
-Filtered water
-Mason Jars
-Screen cut to size or sprouting screens and mason lids
-Dehydrator or oven set at lowest temp.
-Vita mix or coffee grinder (if you will be grinding your dehydrated wheat into flour)
If you won’t be grinding into flour, stay tuned for a recipe for sprouted bread straight from the sprouted wheat berries!
First, we must soak our wheat berries.
I soak mine for about 12 hours. I just pour them in the bowl and cover with about 2 inches of filtered water (they do absorb quite a bit of water, so be generous).
Next, I drain and rinse.
I usually pour the leftover liquid into my plants since it contains some really awesome nutrients.
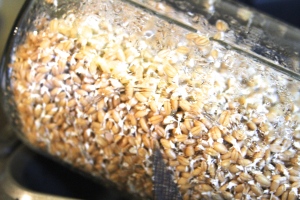
After rinsing, I take a 1/4c (simply because it’s small enough for the mouth of the jar) scoop and fill a few large mason jars 3/4 full.
I then cover my jars with some screen from the hardware store (although there are actual sprouting screens available here and many other places).
I angle my jars in various kitchen pans and leave them to drain and sprout for the next 12-24 hours. (Note: this happens quickly if your house is at all warm, and once the grain begins to show that little white sprout, you are good to go. It’s as nutritious as it will be at this point, and I find that it’s less dusty after dehydrating and grinding when the long sprout isn’t there.)
The next morning…
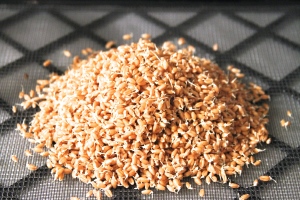
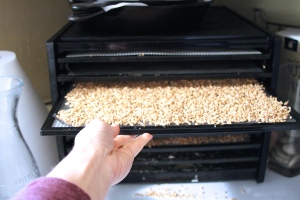
I then take my jars and spread their sprouted berries among the 9 trays of my excalibur dehydrator like so…
Spread with my hands.
Insert.
And voila! You are ready to set your dehydrator to 155 and wait 12 hours or so. I just eat a couple to check and if they are crunchy and taste a bit like Grape Nuts to be sure they are done.
I left mine for about 18 hours because I was doing other things, and because I wanted to be sure they were good and dry since I spread them pretty thick.
At this point it can get kind of messy so I like to lift up the corners of the screens to get all the wheat berries in the center. Note: They shrink, of course, as they dry so adding another layer of screen always helps me to keep them tidy. The dogs don’t mind being invited into the kitchen to clean up though, so if you are like me, you might just let some fall to the ground on purpose. Shhh, don’t tell Mr. H.
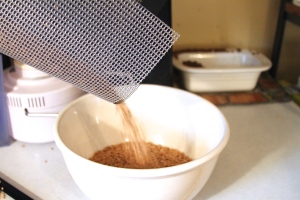
Now pour into whatever storage vessel you choose, or if you are going to grind them into flour a bowl works great. If you are going to store the whole berries, make sure to keep them in an airtight container.
I LOVE having a fresh batch of sprouted wheat in the house! It means lots of sprouted cookies and breads to come.
I just chose to grind it all right away yesterday since I will be storing it in the freezer to keep it fresh!
And Boom a nice big bag of sprouted wheat flour that I can feel GREAT about putting in so many different recipes.
Now, it’s true, I could have gone to the store and bought a bag of sprouted flour. No, not Safeway, as Safeway doesn’t exactly care about anyone but Monsanto and the bottom line. (Did you know that Safeway, and many other huge stores donated millions of dollars to stop the labeling of genetically modified foods? Bad.) At our local co-op a 5lb bag is about $7. Not bad. However, this is more than 5lbs, and it cost less, and I made it with my hands and nothing beats that feeling.
There are so many wonderful things to be made with this flour. I couldn’t even wait for the freshly ground flour to cool before mixing a batch of grass-fed butter shortbread cookies yesterday. Up next, that recipe.
“Happiness is a warm cookie.”
-BeeBaby


